Control EC2 GUI Desktop from Web Browser
Use a VNC client online to access your EC2 instance


-
-
GUI desktop environments are helpful for many EC2 use cases. Unfortunately, AWS doesn't provide an easy way to configure a desktop GUI. AWS offers managed services like Amazon WorkSpaces and NICE DCV exist, but you lose the customizability and pricing offered by a raw EC2.
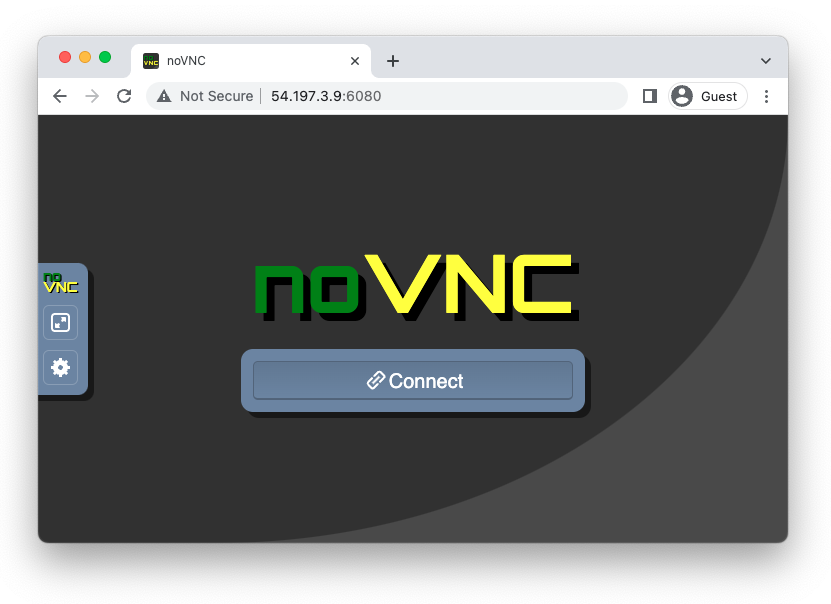
Since EC2s run Linux, we can configure a GUI ourselves. First we'll use VNC, a protocol for sharing desktop environments over the internet. However, VNC alone is clunky; end users must install VNC software on their end to view the GUI. So we'll also use noVNC, a VNC client that runs on a website. By using a web browser like Chrome or Safari, VNC becomes tons more accessible by not requiring additional software for end users. Users can simply visit http://[ipaddress]:[port] in their browser of choice.
Setup
There are two options for setup. Option 1 outlines the traditional manual installation through the AWS Web Console and SSH. For anyone who wants to automate setup or doesn't want to deal with SSH, option 2 uses CloudFormation, AWS's Infrastructure as Code (IAC) tool.
Option 1: Manual Setup with Console and SSH
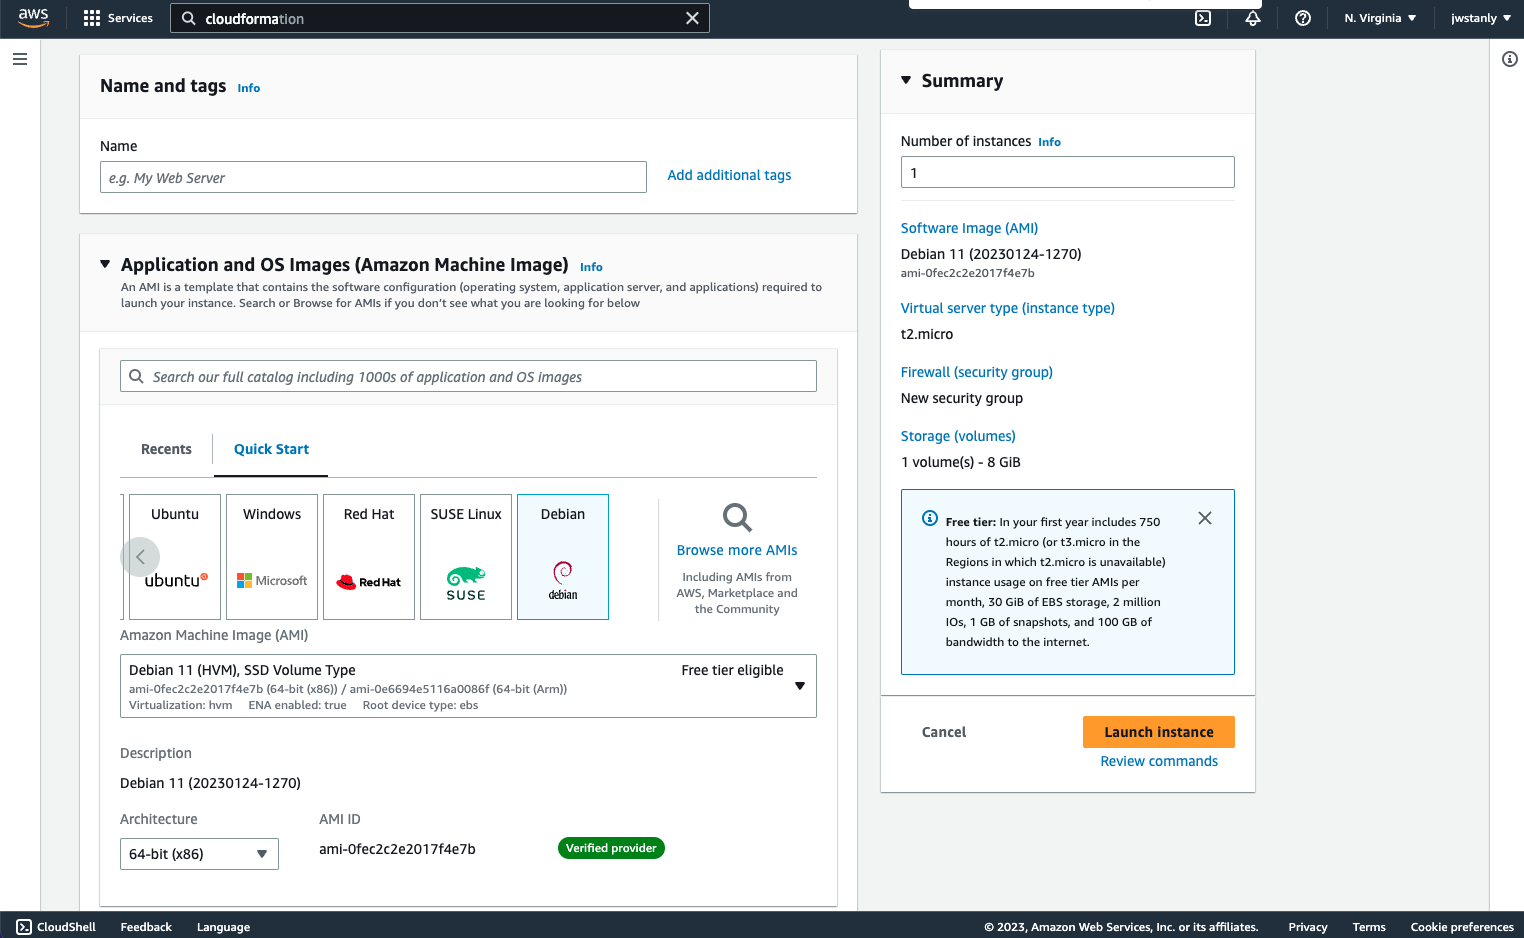
We can setup an EC2 through the Web Console. Visit the EC2 launch instance page and do the following below. If you're unfamiliar with launching an EC2 through the console, see this tutorial.
- Select a Debian AMI
- Create or select any key pair we can use for SSH later
- Create or select a security group that allows SSH traffic (port 22)
- All other options can be left default
Once launched, find the public IP address and SSH into the EC2 as admin using the key pair you selected. You'll need to download the key pair and run the command in the same directory.
ssh -i "[KEY_PAIR_CERT_NAME].cer" admin@[PUBLIC_IP_ADDRESS]We should now be in the EC2. First install the packages needed. We'll use XFCE as our desktop environment, which will be responsible for creating the GUI desktop that noVNC serves. We'll also use TightVNC as our underlying VNC server, and dbus-x11 to help XFCE and TightVNC talk to each other. We run these as noninteractive to avoid installation prompts to quickly choose the defaults.
sudo apt-get update
sudo DEBIAN_FRONTEND=noninteractive apt-get install -q -y xfce4 xfce4-goodies tightvncserver dbus-x11 novnc
Then create a new user called vncuser. To setup TightVNC we'll create some files in a folder called .vnc. We'll create passwd to store the password VNC clients will use for authentication, config for our display resolution, and xstartup to tell TightVNC to use XFCE. Provide password and resolution (format as [width]x[height] like "1920x1200") information through environment variables.
export VNC_PASSWORD=[VNC_PASSWORD]
export VNC_DIMENSIONS=[VNC_DIMENSIONS]

sudo useradd vncuser -m
sudo echo "vncuser:$VNC_PASSWORD" | sudo chpasswd
sudo mkdir /home/vncuser/.vnc
sudo chown -R vncuser:vncuser /home/vncuser/.vnc
sudo su -l -c 'printf "$VNC_PASSWORD\n$VNC_PASSWORD\n\n" | vncpasswd' vncuser
sudo chmod 600 /home/vncuser/.vnc/passwd
sudo su -l -c 'echo -e "geometry=$VNC_DIMENSIONS" > /home/vncuser/.vnc/config' vncuser
sudo chmod 600 /home/vncuser/.vnc/config
sudo su -l -c 'echo -e "#!/bin/bash\nxrdb $HOME/.Xresources\nstartxfce4 &" > /home/vncuser/.vnc/xstartup' vncuser
sudo chmod +x /home/vncuser/.vnc/xstartup

unset VNC_PASSWORD
unset VNC_DIMENSIONS
Then make noVNC's webpage the home page, so user's don't need to manually specify /vnc.html at the end of the URL path to visit your desktop.
sudo ln -s /usr/share/novnc/vnc.html /usr/share/novnc/index.htmlNow we'll write bash scripts to start and stop noVNC. Since we need to launch both TigerVNC and noVNC, scripts will help us ensure they work together. Open the nano text editor and paste these two scripts. If you want noVNC to run on a different port, feel free to change 6080 (however don't change TigerVNC's default port 5901).
sudo nano /home/vncuser/startvnc.sh#!/usr/bin/bash
/usr/bin/vncserver :$1
websockify -D --web=/usr/share/novnc/ $((6080-1+$1)) localhost:$((5901-1+$1))sudo nano /home/vncuser/stopvnc.sh#!/usr/bin/bash
kill $(lsof -ti tcp:$((6080-1+$1)))
/usr/bin/vncserver -kill :$1
exit 0We'll now wrap these scripts in a systemd service. This ensures noVNC launches on its own, like when the server reboots. Create a service file and paste the following.
sudo nano /etc/systemd/system/vncserver@.service[Unit]
Description=Start VNC server at startup
After=syslog.target network.target
[Service]
Type=forking
User=vncuser
Group=vncuser
WorkingDirectory=/home/vncuser
PIDFile=/home/vncuser/.vnc/%H:%i.pid
ExecStartPre=/home/vncuser/stopvnc.sh %i
ExecStart=/home/vncuser/startvnc.sh %i
ExecStop=/home/vncuser/stopvnc.sh %i
[Install]
WantedBy=multi-user.target
Now make your EC2 aware of the new service and start it up.
sudo systemctl daemon-reload
sudo systemctl enable vncserver@1.service
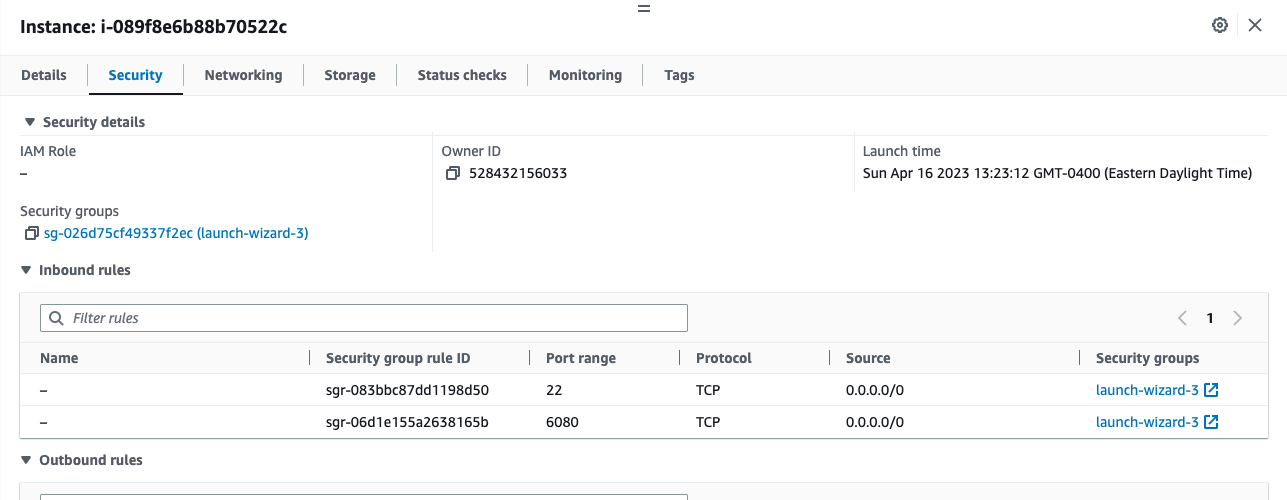
sudo systemctl start vncserver@1.serviceYour noVNC client is now running, but you need to make it accessible to the public internet. Quit your SSH session and return to the AWS Web Console. We need to add your noVNC port as an ingress rule to the EC2's security group. On the EC2 dashboard find your instance, click "Security", click the security group, click "Edit inbound rules", click "Add rule", change the port range to your noVNC port (6080 likely), change the source to "Anywhere-IPv4", and click "Save rules".
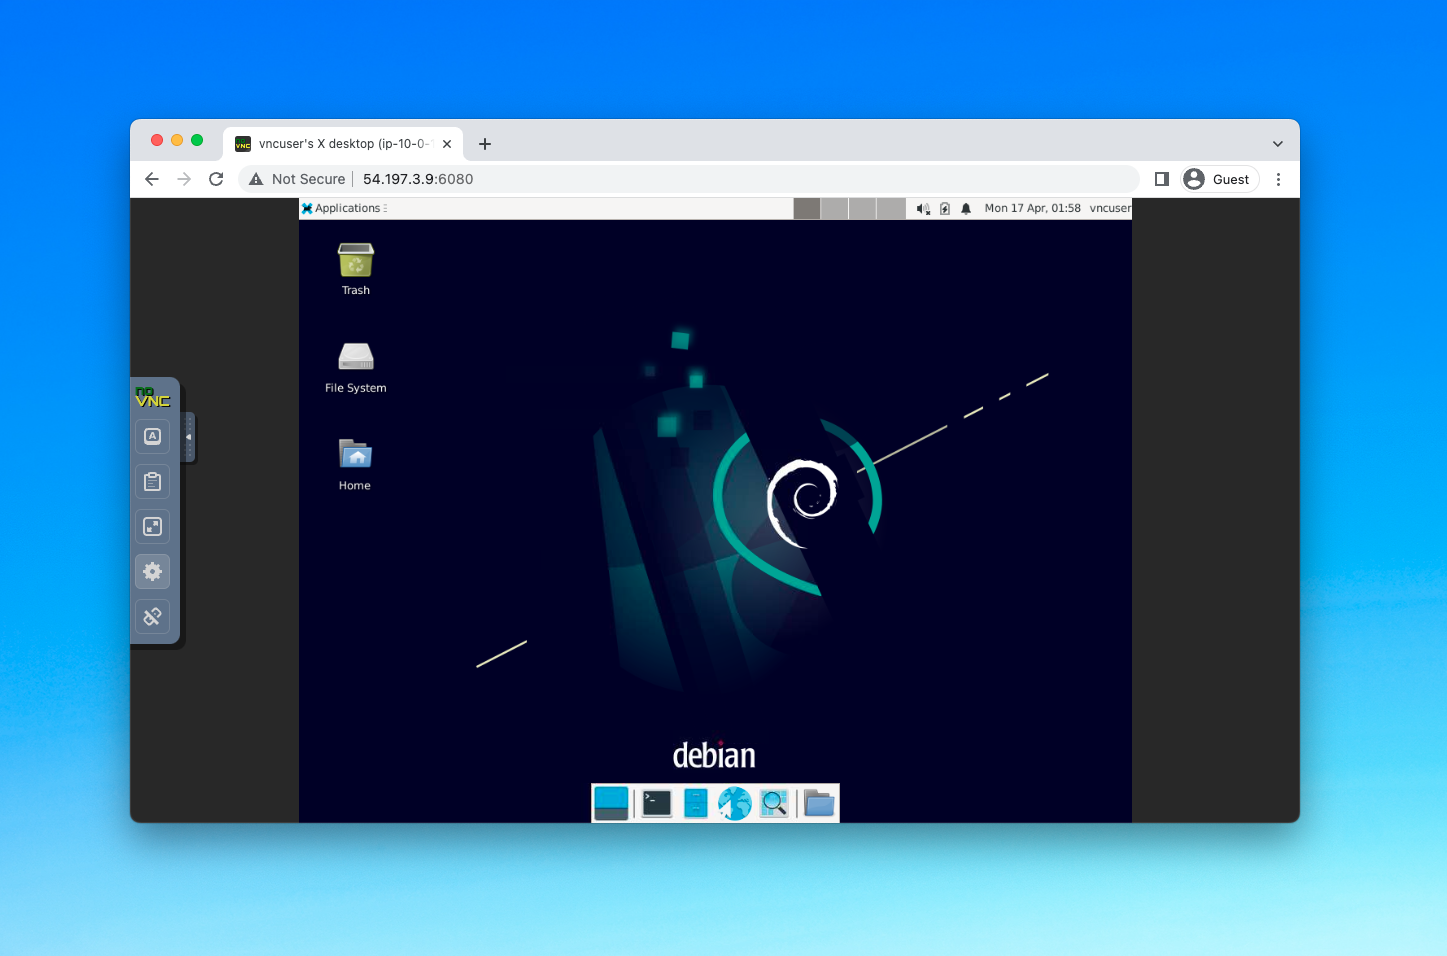
Congrats! Your EC2 now has a GUI desktop interface usable on a web browser. Just visit http://[ec2_public_ip_address]:[no_vnc_port] and enter the password you set.
Option 2: Automatic Setup With CloudFormation
This CloudFormation template sets up an EC2 running Debian 11 with XFCE as the desktop environment and TightVNC as the underlying VNC server. noVNC will run on a publicly available port. The EC2 is placed in a new Virtual Private Cloud (VPC), which allows public internet traffic to noVNC but blocks all other traffic like traditional SSH and HTTP.
Note this template uses parameters. CloudFormation parameters let us modify our setup at creation. This is how you can specify your password for noVNC entry, or custom dimensions for the desktop. For stronger workloads, the default instance type t2.micro should be changed. If you want to switch to ARM vs x86, change both the instance type and the AMI paramater to the correct version of Debian 11 (AMIs for Debian 11 are listed on Debian's wiki).
We run all the commands outlined in the manual setup inside UserData which run on boot.
AWSTemplateFormatVersion: '2010-09-09'
Description: 'EC2 with browser supported GUI using noVNC'

Parameters:
  Ec2InstanceType:
    Type: String
    Default: t2.micro
    Description: Enter EC2 instance type to use for the instance

  Ec2Ami:
    Type: AWS::EC2::Image::Id
    Default: ami-0fec2c2e2017f4e7b
    Description: Enter AMI to use for the EC2 instance

  NoVncPort:
    Type: Number
    Default: 6080
    Description: Starting port for noVNC instance access

  VncDimensions:
    Type: String
    Default: 1280x720
    Description: Enter dimensions for VNC session

  VncPassword:
    Type: String
    Default: password
    Description: Enter password for noVNC access

Resources:
  VPC:
    Type: AWS::EC2::VPC
    Properties:
      CidrBlock: 10.0.0.0/16
      EnableDnsSupport: true
      EnableDnsHostnames: true
      Tags:
        - Key: Name
          Value: !Sub ${AWS::StackName}-vpc

  InternetGateway:
    Type: AWS::EC2::InternetGateway
    Properties:
      Tags:
        - Key: Name
          Value: !Sub ${AWS::StackName}-internet-gateway

  VPCGatewayAttachment:
    Type: AWS::EC2::VPCGatewayAttachment
    Properties:
      InternetGatewayId: !Ref InternetGateway
      VpcId: !Ref VPC

  PublicSubnet:
    Type: AWS::EC2::Subnet
    Properties:
      VpcId: !Ref VPC
      CidrBlock: 10.0.1.0/24
      AvailabilityZone: !Select [ 0, !GetAZs ]
      MapPublicIpOnLaunch: true
      Tags:
        - Key: Name
          Value: !Sub ${AWS::StackName}-subnet


  PublicRouteTable:
    Type: AWS::EC2::RouteTable
    Properties:
      VpcId: !Ref VPC
      Tags:
        - Key: Name
          Value: !Sub ${AWS::StackName}-route-table

  PublicRoute:
    Type: AWS::EC2::Route
    DependsOn: VPCGatewayAttachment
    Properties:
      RouteTableId: !Ref PublicRouteTable
      DestinationCidrBlock: 0.0.0.0/0
      GatewayId: !Ref InternetGateway

  PublicSubnetRouteTableAssociation:
    Type: AWS::EC2::SubnetRouteTableAssociation
    Properties:
      SubnetId: !Ref PublicSubnet
      RouteTableId: !Ref PublicRouteTable

  SecurityGroup:
    Type: AWS::EC2::SecurityGroup
    Properties:
      GroupName: !Sub ${AWS::StackName}-security-group
      GroupDescription: Security group for VNC access over noVNC
      VpcId: !Ref VPC
      SecurityGroupIngress:
        - Description: noVNC
          IpProtocol: tcp
          FromPort: !Ref NoVncPort
          ToPort: !Ref NoVncPort
          CidrIp: 0.0.0.0/0

  EC2Instance:
    Type: AWS::EC2::Instance
    Properties:
      ImageId: !Ref Ec2Ami
      InstanceType: !Ref Ec2InstanceType
      NetworkInterfaces:
        - AssociatePublicIpAddress: true
          DeviceIndex: "0"
          Description: Network interface for EC2 instance
          GroupSet:
            - !Ref SecurityGroup
          SubnetId: !Ref PublicSubnet
      Tags:
        - Key: Name
          Value: !Sub ${AWS::StackName}-server
      UserData:
          Fn::Base64: !Sub |
              #!/bin/bash
              sudo apt-get update
              sudo DEBIAN_FRONTEND=noninteractive apt-get install -q -y xfce4 xfce4-goodies tightvncserver dbus-x11 novnc

              sudo useradd vncuser -m
              sudo echo "vncuser:${VncPassword}" | sudo chpasswd
              sudo mkdir /home/vncuser/.vnc
              sudo chown -R vncuser:vncuser /home/vncuser/.vnc
              sudo su -l -c 'printf "${VncPassword}\n${VncPassword}\n\n" | vncpasswd' vncuser
              sudo chmod 600 /home/vncuser/.vnc/passwd
              sudo su -l -c 'echo -e "geometry=${VncDimensions}" > /home/vncuser/.vnc/config' vncuser
              sudo chmod 600 /home/vncuser/.vnc/config
              sudo su -l -c 'echo -e "#!/bin/bash\nxrdb $HOME/.Xresources\nstartxfce4 &" > /home/vncuser/.vnc/xstartup' vncuser
              sudo chmod +x /home/vncuser/.vnc/xstartup

              sudo ln -s /usr/share/novnc/vnc.html /usr/share/novnc/index.html

              sudo su -l vncuser -c 'echo "#!/usr/bin/bash
              /usr/bin/vncserver :\$1
              websockify -D --web=/usr/share/novnc/ \$((${NoVncPort}-1+\$1)) localhost:\$((5900+\$1))" > /home/vncuser/startvnc.sh'
              sudo chmod +x /home/vncuser/startvnc.sh

              sudo su -l vncuser -c 'echo "#!/usr/bin/bash
              kill \$(lsof -ti tcp:\$((${NoVncPort}-1+\$1)))
              /usr/bin/vncserver -kill :\$1
              exit 0" > /home/vncuser/stopvnc.sh'
              sudo chmod +x /home/vncuser/stopvnc.sh

              sudo sh -c 'echo "[Unit]
              Description=Start VNC server at startup
              After=syslog.target network.target
              [Service]
              Type=forking
              User=vncuser
              Group=vncuser
              WorkingDirectory=/home/vncuser
              PIDFile=/home/vncuser/.vnc/%H:%i.pid
              ExecStartPre=/home/vncuser/stopvnc.sh %i
              ExecStart=/home/vncuser/startvnc.sh %i
              ExecStop=/home/vncuser/stopvnc.sh %i
              [Install]
              WantedBy=multi-user.target" > /etc/systemd/system/vncserver@.service'

              sudo systemctl daemon-reload
              sudo systemctl enable vncserver@1.service
              sudo systemctl start vncserver@1.service

Outputs:
  AccessUrl:
    Description: URL to access the noVNC interface through a web browser
    Value: !Sub "http://${EC2Instance.PublicIp}:${NoVncPort}"
Save the template to a yaml like template.yml. Then to deploy, either use the AWS CLI or the Web Console.
With the CLI, modify your stack name, specify any parameters you want as arguments below, then run:
aws cloudformation create-stack --stack-name [STACK_NAME] \
--template-body file://template.yml \
--parameters ParameterKey=VncPassword,ParameterValue=[NEW_PASSWORD],ParameterKey=Ec2InstanceType,ParameterValue=[NEW_TYPE]
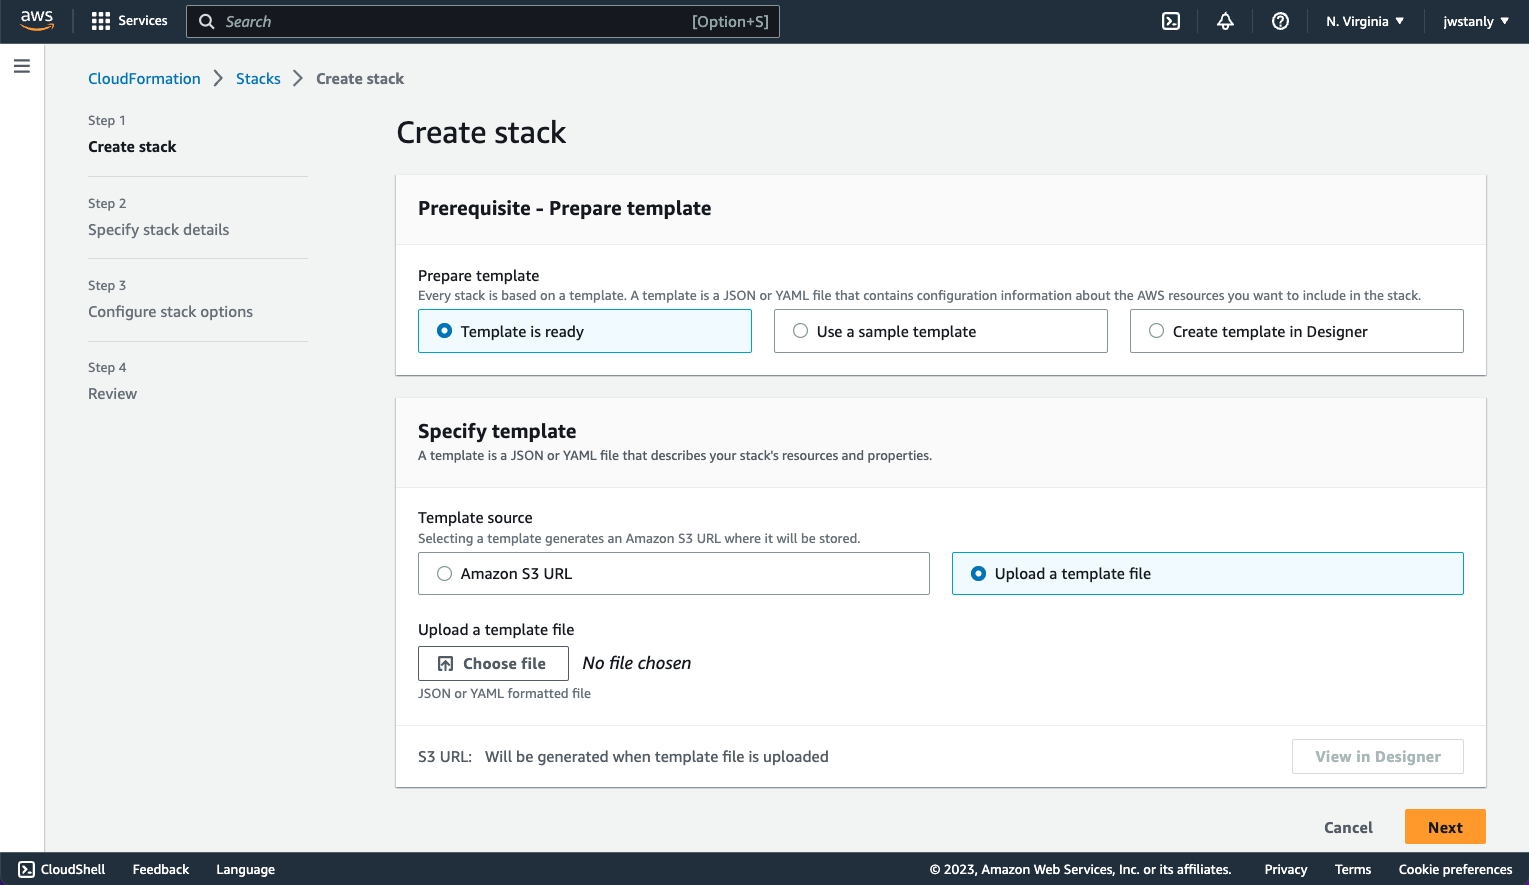
With the Web Console, visit the CloudFormation create stack page, upload the template file, and add your stack name and parameters while keeping the default options for everything else.
With either deployment approach, you should now have an EC2 with a GUI desktop interface usable on a web browser. Just visit http://[ec2_public_ip_address]:[no_vnc_port] and enter the password you set with the VncPassword CloudFormation parameter. Congrats!
Creating Multiple Desktops
If multiple users visit the same noVNC instance simultaneously, they will both control the same desktop. Your keyboard and mouse inputs will be shared, which can be annoying for workloads requiring multiple people.
Thankfully, our noVNC service is templated with an argument. To run more desktops in parallel, simply instantiate the service again with a higher number as the argument:
sudo systemctl start vncserver@2.service
sudo systemctl start vncserver@3.service
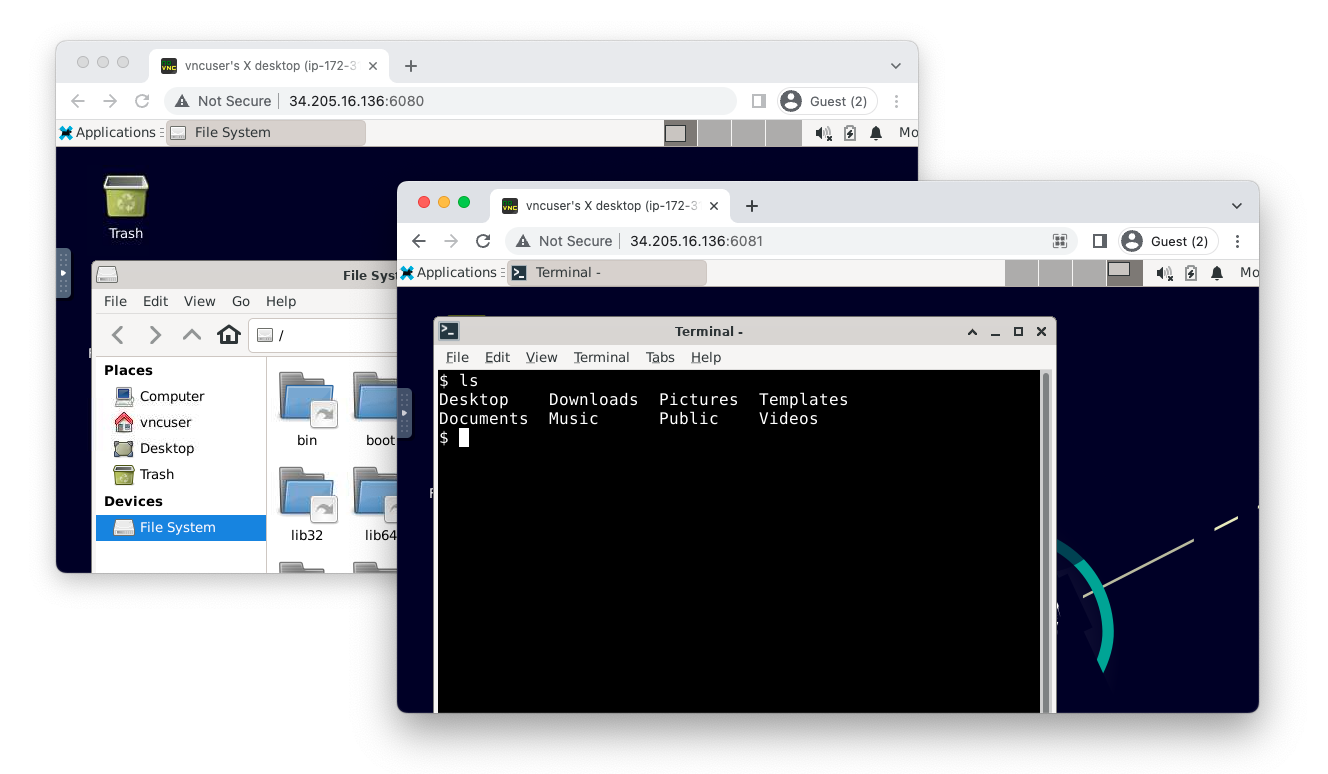
...Our startvnc.sh script will sequentially increment noVNC's port by the service argument. So if vncserver@1.service runs on :6080, vncserver@2.service will run on :6081, and so forth.
Desktops on different ports will be separate. Although the same underlying file system and vncuser will be shared, all desktops will have their own windows as well as keyboard/mouse input.
Just note our EC2's security group will need to be modified to allow the new port(s). If you setup through the Web Console, go edit the security group ingress rule to support a range of ports like "6080 - 6082". If you setup through CloudFormation, under SecurityGroup change ToPort: to the end range of noVNC ports, either hard coded like ToPort: 6082 or with a new parameter like ToPort: !Ref NoVncEndPort.
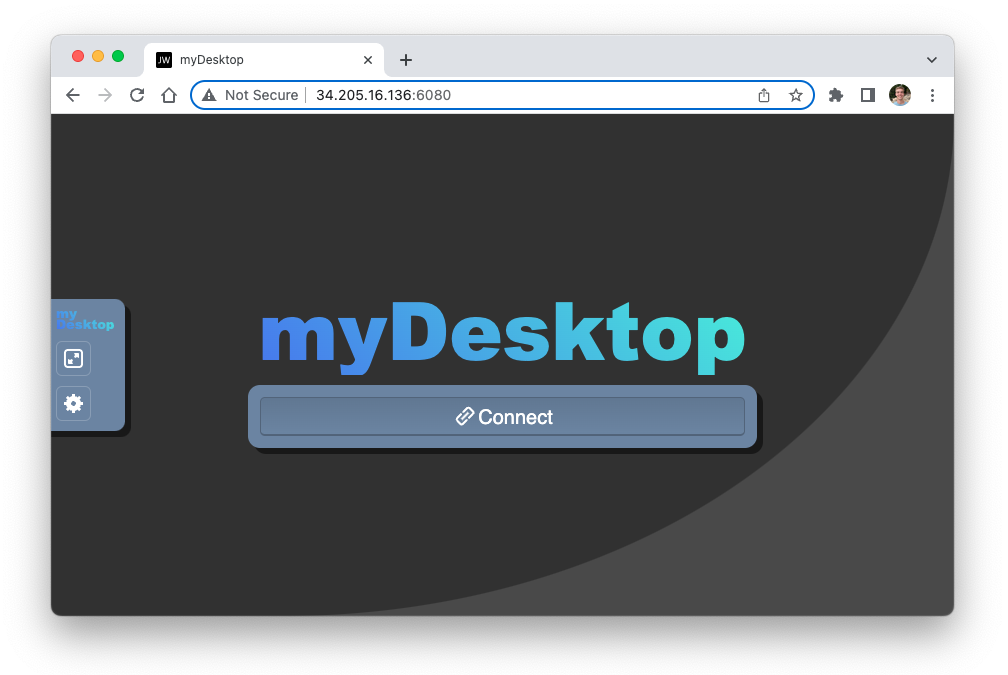
Customizing noVNC
noVNC is HTML/CSS like any other webpage. You can edit the source to change metadata like the title or favicon, or HTML/CSS attributes inside the page.
You can edit /usr/share/novnc to your needs. You can also reference noVNC's GitHub to view its source.